

Since I’m going through the trouble of making yeast starters now, I though it might be a good idea to try and get the maximum amount of yeast out of the starter. I’m getting an oxygen injection system soon, but I also wanted a laboratory magnetic stir plate to keep the yeast in constant suspension. These are a little pricey retail but a little research turned up a simple homemade version! It works great and was fairly simple to construct out of parts I already had laying around the shop.
Saturday, February 18, 2006

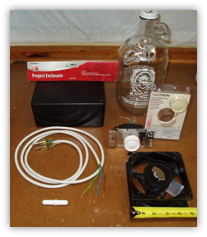
Parts List
1. Project Box: Radio Shack 270-1807, 7”x5”x3”: $6
2. FAN Dimmer Switch, Ace Hardware: $10.50
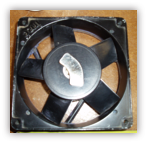
3. 110v AC Computer Muffin Fan: Salvage (free)
4. Rare Earth Magnet from computer hard drive: Salvage (free)
5. Electric Plug/Cord: Salvage (free)
6. Teflon Coated Stir Bar: Undisclosed Source (free)


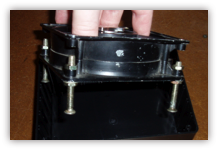
My fan is about 5.25” wide and just fits in the largest project box Radio Shack had. I used a sharp chisel to trim down the inner ribs of the box so the fan would fit better. I drilled out the mounting holes in the fan to fit some bolts I had laying around. I used two nuts to secure these. They act as feet and allow precise height adjustment of the fan.
Glued on top of the fan is the hard drive magnet. These things are powerful for their size and work well for this project. The magnet needs to be just under the project box lid for maximum effect. Mine is not quite centered so my stir bar wobbles a bit.
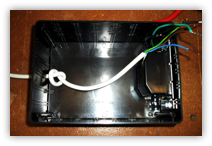
I fed the old computer power cord through a hole in one end of the box and tied a knot in it. Also applied a little hot glue to hold it in place. I mounted the fan speed control on the other end. I had to trim the ears on the switch to get it to fit in the box. NOTE: Make sure you use a FAN control and not a LIGHT dimmer. It is more expensive than the light dimmer, but is built for 5 amps. The light dimmer won’t work, trust me ;-)
The wiring is straight forward. If you know nothing about electrical wiring, this project might not be for you. Here is the fan/magnet in position with a couple of wood blocks glued in to keep it from moving around. (Notice how the switch turned from black to white? I wonder what that’s about?)
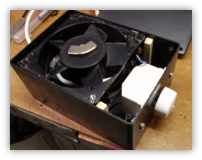
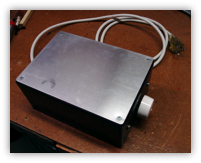
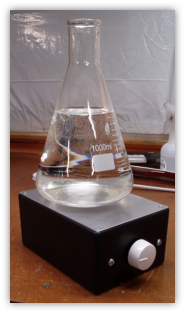
The project box comes with a plastic and aluminum cover. I used them both to keep the top stiff as this is where the flask goes. That about does it. Just add in your stir bar and adjust the fan speed to keep it under control. Too much force will throw the magnet. It takes a little fiddling to get the speed right when using a 1/2 gallon growler as the bottoms are not as flat as a flask, but you’ll figure it out.